Harvey Birdman Attorney at Law Walkthrough

Index and Control Menu
Index
Menu:
Controls
Walkthrough
1.1. The Burning Question
1.2. Cleaning Crew
1.3 From Glamour To Slamour
1.4. Personal Piracy
1.5 Two Birds, One Throne
CONTROLS
The controls for this game are really easy, here is the list:
Joystick (Nunchuck): Move the cursor trough the interactive menu.
A Button: Confirmation button.
B Button: Cancel button.
Plus Button: Push it once and you will be taken to the pause menu.
Minus Button: Push it and you will be taken to the inventory menu.
1 or 2 button: Show your crests (in other words, how many lives you have)
Harvey Birdman Attorney at Law Gallery


Walktrough Part One
The game dynamics are really simple you just need to select an answer, the appropriate one to move one in the case; explore the inventory menu as well the screen if you want to win each scenario, now we have clear this, we can move on in the walktrough.
1.1. The Burning Question
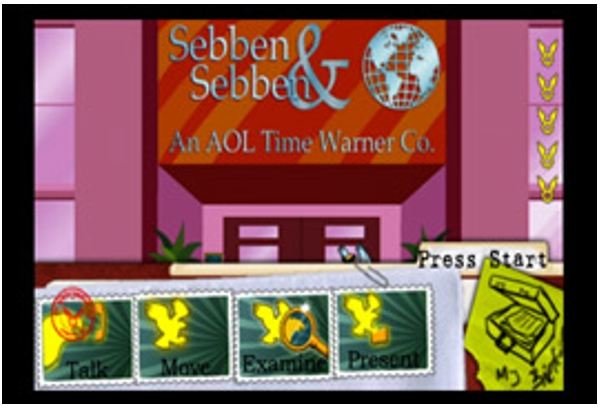
Harvey’s Office:
Q#01: The first situation is going to be with a crossword puzzle for the question “What is a seven letter word for long and hard?” A: Any letter
There will be a small cinematic sequence, and after it ends, the Profile of Peter Potamus and new evidence (Record album, Police report and Matches) are going to be added to the inventory menu.
Defend Peter Potamus
Q#02: It will be asked if “Peter Potamus have laryngitis?” A: Any of the options.
After choosing your answer, a default cross-examination will be activated. No matter what you choose the result will lead to the next part.
Defendant Cross-Examination - Peter Potamus
Q#03: Just complete the question with any of the answers “Potamus is…?” A: Any of the answers.
After another sequence which the results seems to be predetermined a new witness will be added, this time will be Harvey’s adulterous wife Gigi (A reference to the segment The Galaxy Trio).
Witness Cross-Examination - Gigi
Select the first statement to see a hilarious scene which shows the real perpetrator of the case. After the sequence, finish expose the Matches on the third statement and then new evidence will be added (Cigarette Lighter)
Q#04: You can choose between the first option and the third option “What is fishy here?” A: First or Third, right now it doesn’t matter what you choose if it’s the first or third, but beware even if it’s the first case you can do a game over really easy.
After the dialog sequence, press the third option to obtain new evidence (911 Recording).
Present the Recording on the third option for a new set of evidence (Prenuptial Agreement)
Q#05: “It couldn’t be Potamus’ lighter because…” A: You have to choose the first option then the second; don’t select the third or you will lose a continue.
To see the real ending of the case show the prenuptial agreement. Otherwise, if you want to see the bad ending, show anything else.
Walktrough Part 2
1.2. Cleaning Crew
Harvey’s Office:
Q#01: Why is everything missing? A: Choose the first option and then the second option.
Choose the proper options to activate a secret movie. Otherwise, if you don’t choose option one and two, you won’t see the cinematic sequence. Examine the Pile of Money, the Keys of the Car and the Coffee Mug to add them to your evidence list in the inventory menu. Examine Inch (the tiny detective) and the X’s Ray to add Inch and X the Eliminator to your profiles.
A new location will be opened: Javalux Coffee Shop. But, you won’t be able to access Javalux for a while.
Seven & Seven Entrance
The entrance will be a small mess but the objects you are going to examine are clearly visible. Examine the Intercom, the Paper Bag (optional) and the boxers.
Q#02: “How and what should I examine?” A: Choose the second option.
After a small sequence, a new set of evidence will be added to the inventory: the Bag attached to the Boxers and the Intercom.
Walktrough Part 2 Continuation
Javalux Coffee Shop
Q#03: “Tell the police that…” A: Choose the third option.
Now examine the mask balm and the trash can. Do it twice for the trash can so you can add the mask balm and fortune cookie into the evidence menu.
Harvey’s Office
Now you need to talk to Judy – or as she’s also known, Birdgirl – to open a new location, the Prison Entrance. Give the fortune cookie to add the Lobster into evidence menu.
Prison Entrance
First you need to examine your lover and sometimes prison mate Magilla Gorilla to add some information about him. Talk to him and then give the coffee mug to Magilla to add his profile. After you finish talking with Magilla, go and repeat the process to Secret Squirrel. Talk to him and give the mask balm with the bag and boxers to add his profile.
After you finish the interrogation, go and talk to Birdgirl to know what to do next.
Q#04: Do I want to question X? A: Choose the first option or second to activate the next sequence.
Defendant Cross-Examination: Secret Squirrel
Select the second statement to rephrase it. Use the greasy bag on the second statement, then present the small boxers.
Q#05: How to prove Secret Squirrel’s innocence. A: If you want to prove his innocence choose the third option.
Javalux
Examine the blue feather to add it to your inventory. Then we go to X’s the Eliminator Apartment.
X’s Apartment
Now you need to examine X’s business card, then Larry’s Discount Lairs Receipt, and lastly the vacuum tube to add those items into the evidence menu.
Harvey’s Office
This part is really simple. Examine the death ray, then the lever, then the red button (the big one), then the vacuum tube and finally the business card to add them to your evidence menu.
Walktrough Part 2 Continuation
Defendant Cross-Examination: Magilla Gorilla
Select the fourth statement.
Q#06: “Magilla couldn’t have robbed the office because…” A: The second option is the correct one. After the sequence end, present as evidence the death ray.
Defendant Cross-Examination: Peanut
Select the only statement that will show in the first dialogue, then choose the fifth one in the second dialog, and present in conjunction the pile of money with the fifth statement. Then choose the fourth statement to end the sequence with Peanut.
Defendant Cross-Examination: X The Eliminator
Select the third statement and select the second business card along with it.
Revision Cross-Examination: X The Eliminator
Select the third statement, then present as evidence Larry’s Discount Lairs Receipt along with the fourth statement. Finally, present as evidence the first business card.
Harvey’s Office
To obtain the good ending for this case present the coffee cup and the greasy bag, and you will finish with this case.
Walktrough Part 3
1.3 From Glamour To Slamour
Harvey’s Office
Q#01: What is this duck’s name? A: Any answer will give you a funny answer; this sequence is inspired in the series, where Harvey can remember Yakky Doodle’s name change.
After you finish talking with Yakky, his profile will be added to the inventory menu.
Courtroom
After you enter the courtroom a new set of evidence will be added: the confession note and the heist note.
Q#02: Make an argument concerning… A: Select the third option first and then select the first option.
Defendant Cross-Examination: Yakky Doodle
Select the first statement, and then with the third statement, show the confession note.
Q#03: What evidence proves that Yakky is Innocent? A: Select the third option.
After the dialog present the heist note.
Present the Heist Note.
Harvey’s Cell
Soon as this new sequence starts, a new profile will be added, you won’t believe it… will be Sebben and Sebben
Social Area
New evidence will be added in the social area; it will be the mayonnaise. Next, proceed and talk to Dum Dum.
Q#04: Take the phone number from Dum Dum? A: Select the second option.
After a small jive talk with Dum Dum, a new set of evidence (the toilet paper) will be added, and then Dum Dum’s profile will be added to the inventory.
Prison Phone
This sequence is really easy, just go and talk to the guard, when you finish talking to the guard you will be escorted to your cell.
Harvey’s Cell
In Harvey’s cell go and talk to the fat man about every topic that is show in the dialogue screen. When you finish talking new locations will be open the garden and the exercise room. The profile of the fat man will be added too.
After talking with the fat man, examine the cucumber and add it to the evidence menu.
Exercise Room
Don’t lose time in this room. Just examine the toy and add it to the evidence menu.
Garden
Go and talk about every topic to Number 2. After you finish talking with this prisoner, his profile will be added.
Then examine the pile of dirt. The potato and gray rocks to add them into the evidence menu.
Harvey’s Cell
Walktrough Part 3 Continuation
Show the gray rocks.
Q#05: How do I get that prisoner to move? A: Select the third option.
Proceed to examine the Painted Brick to add it into the evidence menu.
Prison Phone
Present the painted brick.
Q#06: Whose cell is the brick from? A: Select the second option.
Examine the nickel and the list to add them into the evidence menu.
If you want an extra continue, present the Sebben and Sebben profile to obtain it. Then present the toilet paper.
Q#07: What message was I supposed to give? A: Select the third option.
Courtroom
Q#08: Maybe I can get Mentok to let me act as prosecutor by… A: Any option you select is ok.
Defendant Cross-Examination: Dum Dum
Expose the fourth statement and the present Dum Dum’s profile along with the third statement.
Q#09: Who should I call to the stand next? A: Select the second option
After the cinematic sequence present the number two profile.
Defendant Cross-Examination – Number Two
Show Number Two profile along with the third statement, then present the fourth statement.
Q#10: What is Number Two’s scheme? Something involving… A: Select option number two.
After the sequence present the potato.
Harvey’s Cell
Talk to Dum Dum and cover all topics in the conversation. A new evidence will be added US$1.000
Social Area
In the social talk to the mice (Pixie & Dixie) and cover all the topics in the conversation. Another US$1.000 will be given as a piece of evidence along with the potato flashlight.
Exercise Room
Give the Potato Flashlight to add new evidence “the Potato Remote”.
Prison Phone
Give the Potato Remote to end the case.
Walktrough Part 4
1.4. PERSONAL PIRACY
Harvey’s Office
Q#01: “I should…” A: Any answer will give a humorous scene.
After the humorous scene, examine the warrant order for Peanut’s arrest and then the pack of pacifiers to add the items into the evidence menu. A new location will opened “The Prison Visitor’s Area”.
Prison Visitor’s Area
Go and talk to Peanut and choose any of the answers. It doesn’t matter, really. After you finish talking to Peanut, a new location will be open, Phil’s Office.
Phil’s Office
Talk to Birdgirl and choose any of the answer, it doesn’t matter. After you finish talking to her, her profile will be added to your inventory. Then examine the drink coasters and a new location will be open, the bar The Birdcage.
The Birdcage
Go and talk to the bartender about every single topic in the conversation. After you finish talking to the bartender a new set of evidence will be added, the money roll, the MP3 player, the copy stub and Peanut’s fake ID.
Harvey’s Office
Back at Harvey’s office, examine Peanut’s laptop and the power juice to add them into the evidence. Then examine the recycling bin, prospect folder, sticky note and the PRON folder.
Peanut’s profile will be added as well as the evidence you examined.
Copyshop
Examine the Clones R Us brochure and the alert bell. The brochure will be added to the evidence menu. Then, talk to Elliot about every topic given in the conversation. If you want to access a cinematic sequence give him the Fake ID.
Then present him the stub. New evidence (Peanut’s Resume) will be added, as will Elliot’s profile.
Present the Copy Shop Stub.
Courtroom
Q#04: “I should…” A: Select the one of helping Peanut.
Defendant Cross-Examination - Peanut
Select the second and fourth statements. Then press the second and fourth statements. Expose the MP3 with the fourth statement. Present the second statement. Expose Peanut Resume along with the fourth statement. A new profile will be added (Harvey’s clone).
Phil’s Office
In Phil’s office, talk to Phil and cover every single topic that is shown in the conversation. After finishing his conversation, another profile will be open (Sebben and Sebben 2) as well a business card for the Sebben and Sebben annex.
Sebben and Sebben II
Talk to Harvey’s clone but first present the pack of pacifiers.
Defendant Cross-Examination - Birdgirl
Press the second and third statements, and show Peanut’s profile on the third statement.
Q#05: “I should…” A: Select the first option.
The Birdcage
Speak to X. Answer any question with any of the option given.
With question seven you need to choose the third option.
After the conversation, go and examine Birdman’s clone crest and add it to the evidence.
Copyshop
Talk to Birdman clone.
Q#08: “Answer with…” A: Choose the second option.
Q#09: “…the Deadly Duplicator.” A: Choose the third option.
Phil’s Office
Q#10: “How will I prove that Harvey II is an inferior copy?” A: Choose first the second option and then the first option.
Courtroom
Q#11: “Do you want to object?” A: You can choose any option.
Witness Examination - Harvey II
Press the first and second statements, then show the brochure along with the third statement.
Witness Examination - The Deadly Duplicator
Press the fourth statement and then present the crest on the third statement.
Q#12: How will I prove that Harvey II is an inferior copy? A: Choose the first option.
At the end of the sequence call Avenger to end with the case.
Walktrough Part 5
1.5. TWO BIRDS, ONE THRONE
Harvey’s Office
Examine the gift, and then add it to the evidence menu.
Phil’s Office
Talk to Azul Falcone, and cover every single topic. After finishing with Falcone a new location will be open, the Cafeteria.
Cafeteria
As soon you enter the cafeteria, the bathroom will be open as a new location. Examine the tray and the eggs so you can add them to the evidence.
Bathroom
Examine Peter Potamus. Then go to Phil’s Office at Sebben and Sebben.
Phil’s Office
Talk to Falcone and cover every topic. A new location will be opened, the Sebben and Sebben entrance.
S&S Entrance
Go and examine the newspaper and the bus stop; so the Birdcage will be open as a new location and the newspaper will be added to your evidence bag.
Birdcage
Talk to Stan Freezoid to add his profile to your inventory.
Harvey’s Office
Now talk to Peanut and cover every single topic. A new location will be opened (The Utility Closet) and the stock certificate will be added to your evidence menu.
Utility Closet
Examine the spray and it to your evidence bag.
Cafeteria
There is going to be a small cut scene, so enjoy it and then go to Phil’s office.
Phil’s Office
Now at Phil’s office, examine the Bronzoluxe Display, Magnifying Glass and the itinerary so they can be added to the evidence menu. Then examine the remote.
Q#01: Set the temperature to… A: Choose the first option, 32 Degrees.
S&S Entrance
At the entrance go and talk to Vulturo to add his profile to your inventory. Give him the wrapped gift.
Birdcage
Give the magnifying glass to Reducto so you can his unlock his profile.
Harvey’s Office
Present Reducto’s profile and talk to him.
Bathroom
Take a look at the soap and examine it. A new set of evidence will be added: Receipt and Detective Inch.
Harvey’s Office
Present Inch High Private Eye.
Phil’s Office
Enjoy another cut scene.
Courtroom
As soon you enter a new set of evidence will be added: the auction receipt and the bank statement.
Court Hall
Present Reducto’s profile. Then talk to Freezoid, but the payment option – do it at the end of the conversation.
Courtroom
Q#02: I should inquire about… A: Everything.
At the end of the scene present the magnifying glass.
Q#03: Who is Senor Antonio de Rivera Gareia Azul? A: Select Spanish person.
Add the file box to the evidence inventory.
Defendant Cross-Examination - Blue Falcone
Press the third statement, then present the auction receipt with the fourth statement. Next, press on the sixth statement, and lastly, present the stock certificate on the seventh statement.
Defendant Cross-Examination - Blue Falcone
Press the third statement and then present the receipt on the fourth statement. New evidence will be added (the blueprints).
Q#04: How did Blue Falcone just incriminate himself? A: Choose the answer related to the toxicity.
Now you’re done the last case and the game!